ART 310 – Introduction to Woodworking
 Download Image
Taken during my Fall 2023 semester, Introduction to Woodworking opened my eyes to the world of wood craftsmanship. This course unilaterally exceeded my already high expectations and led to one of the most enjoyable classes I have ever taken.
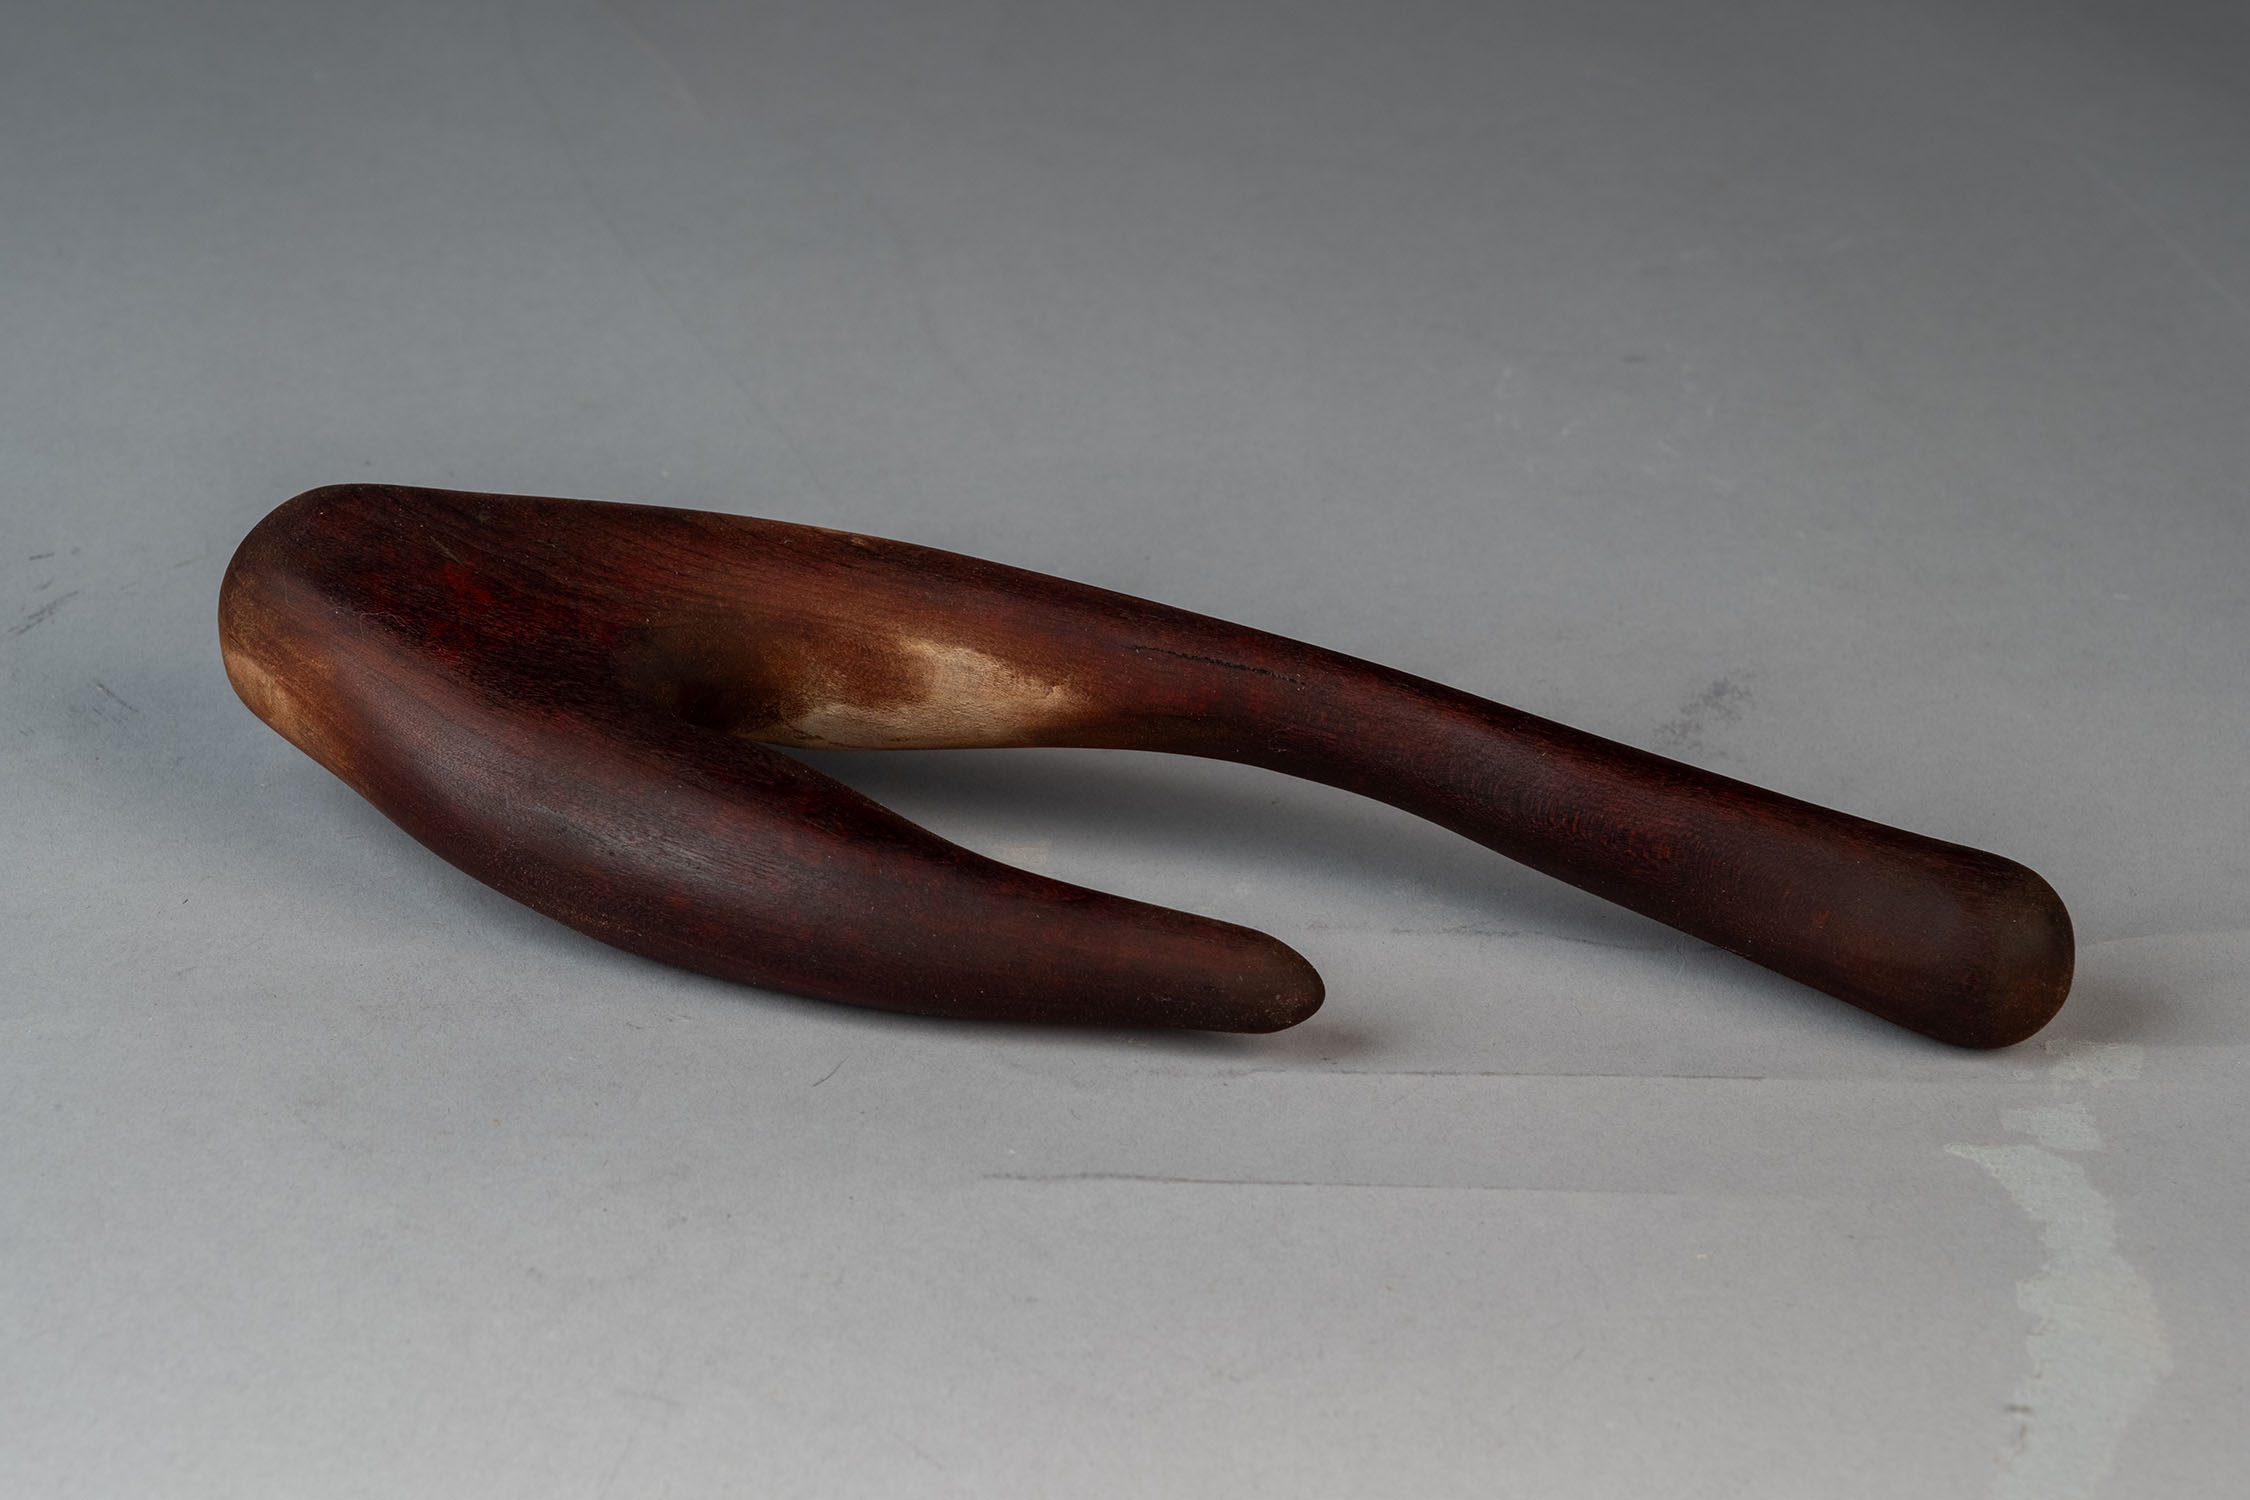
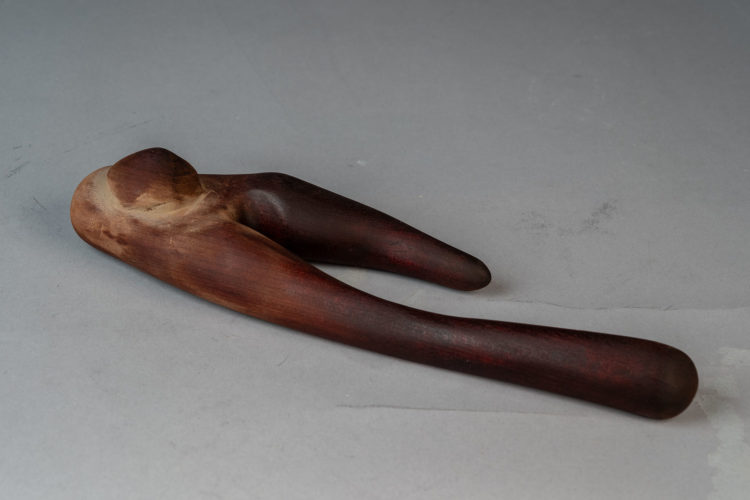
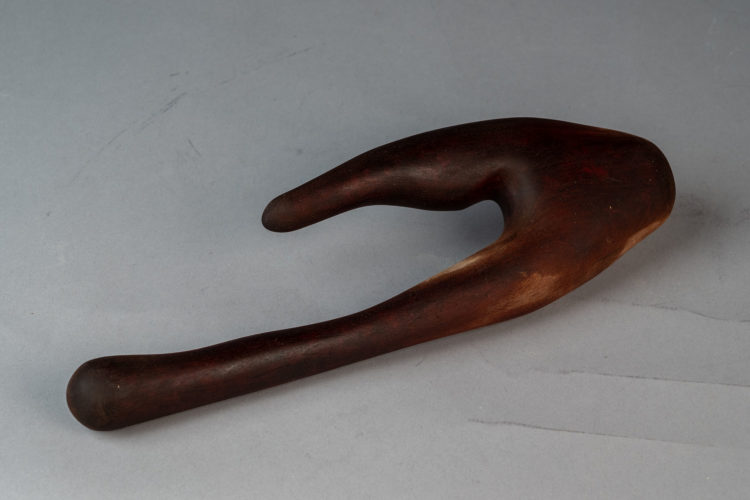
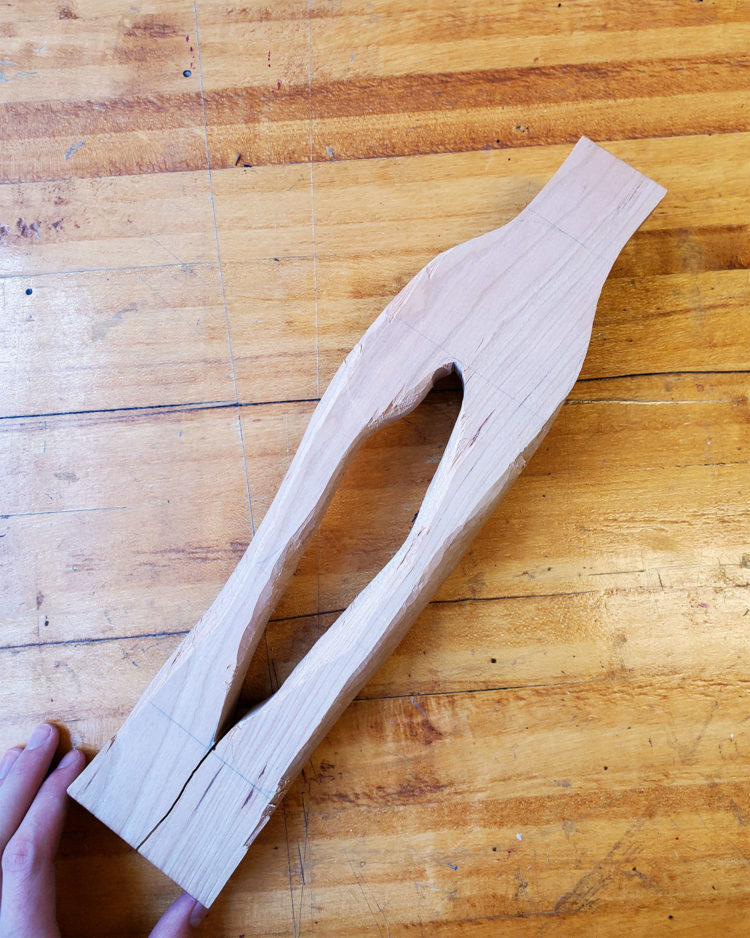
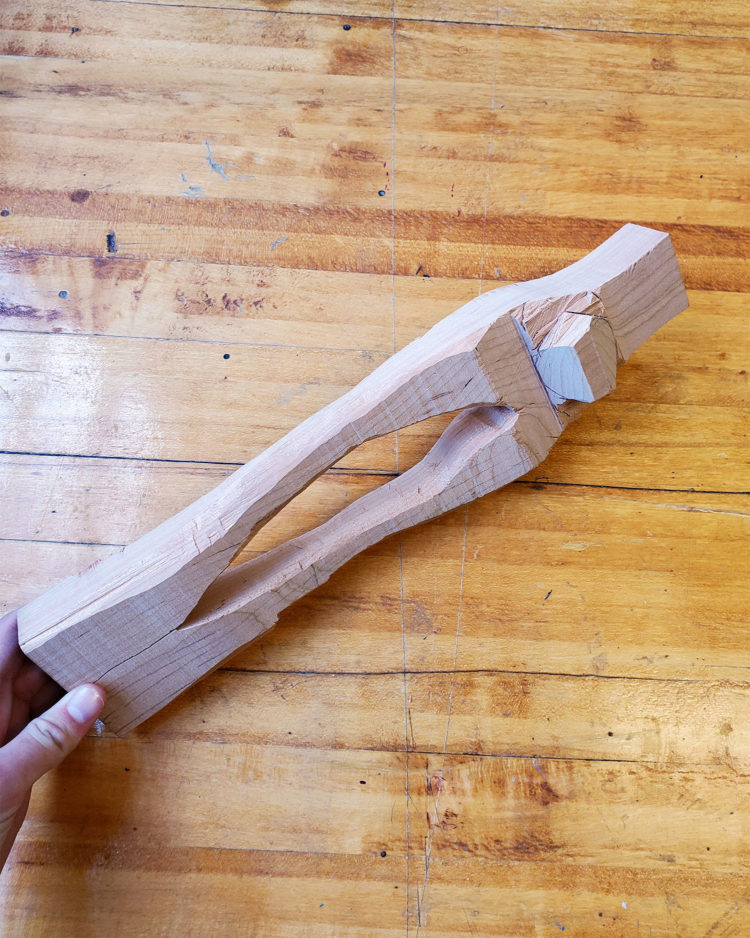
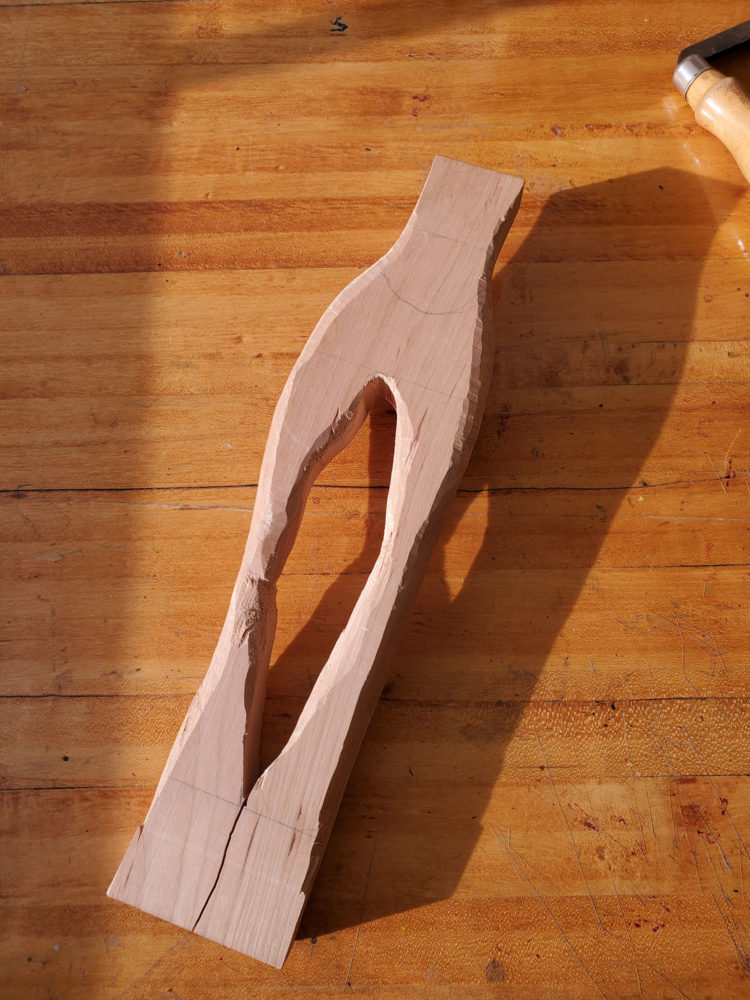
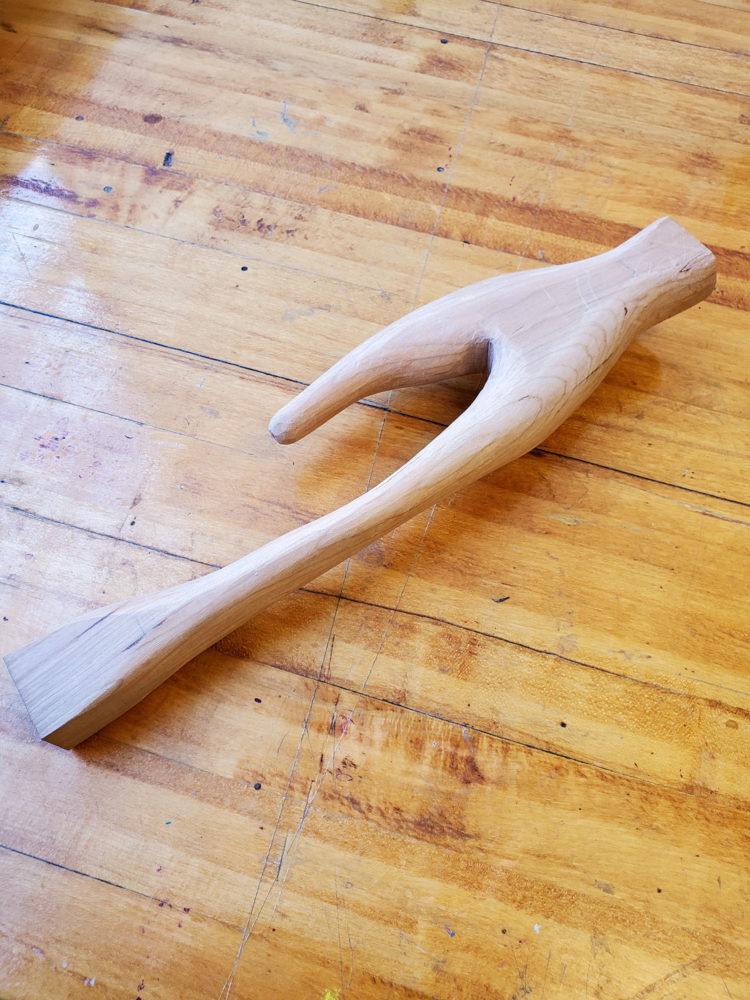
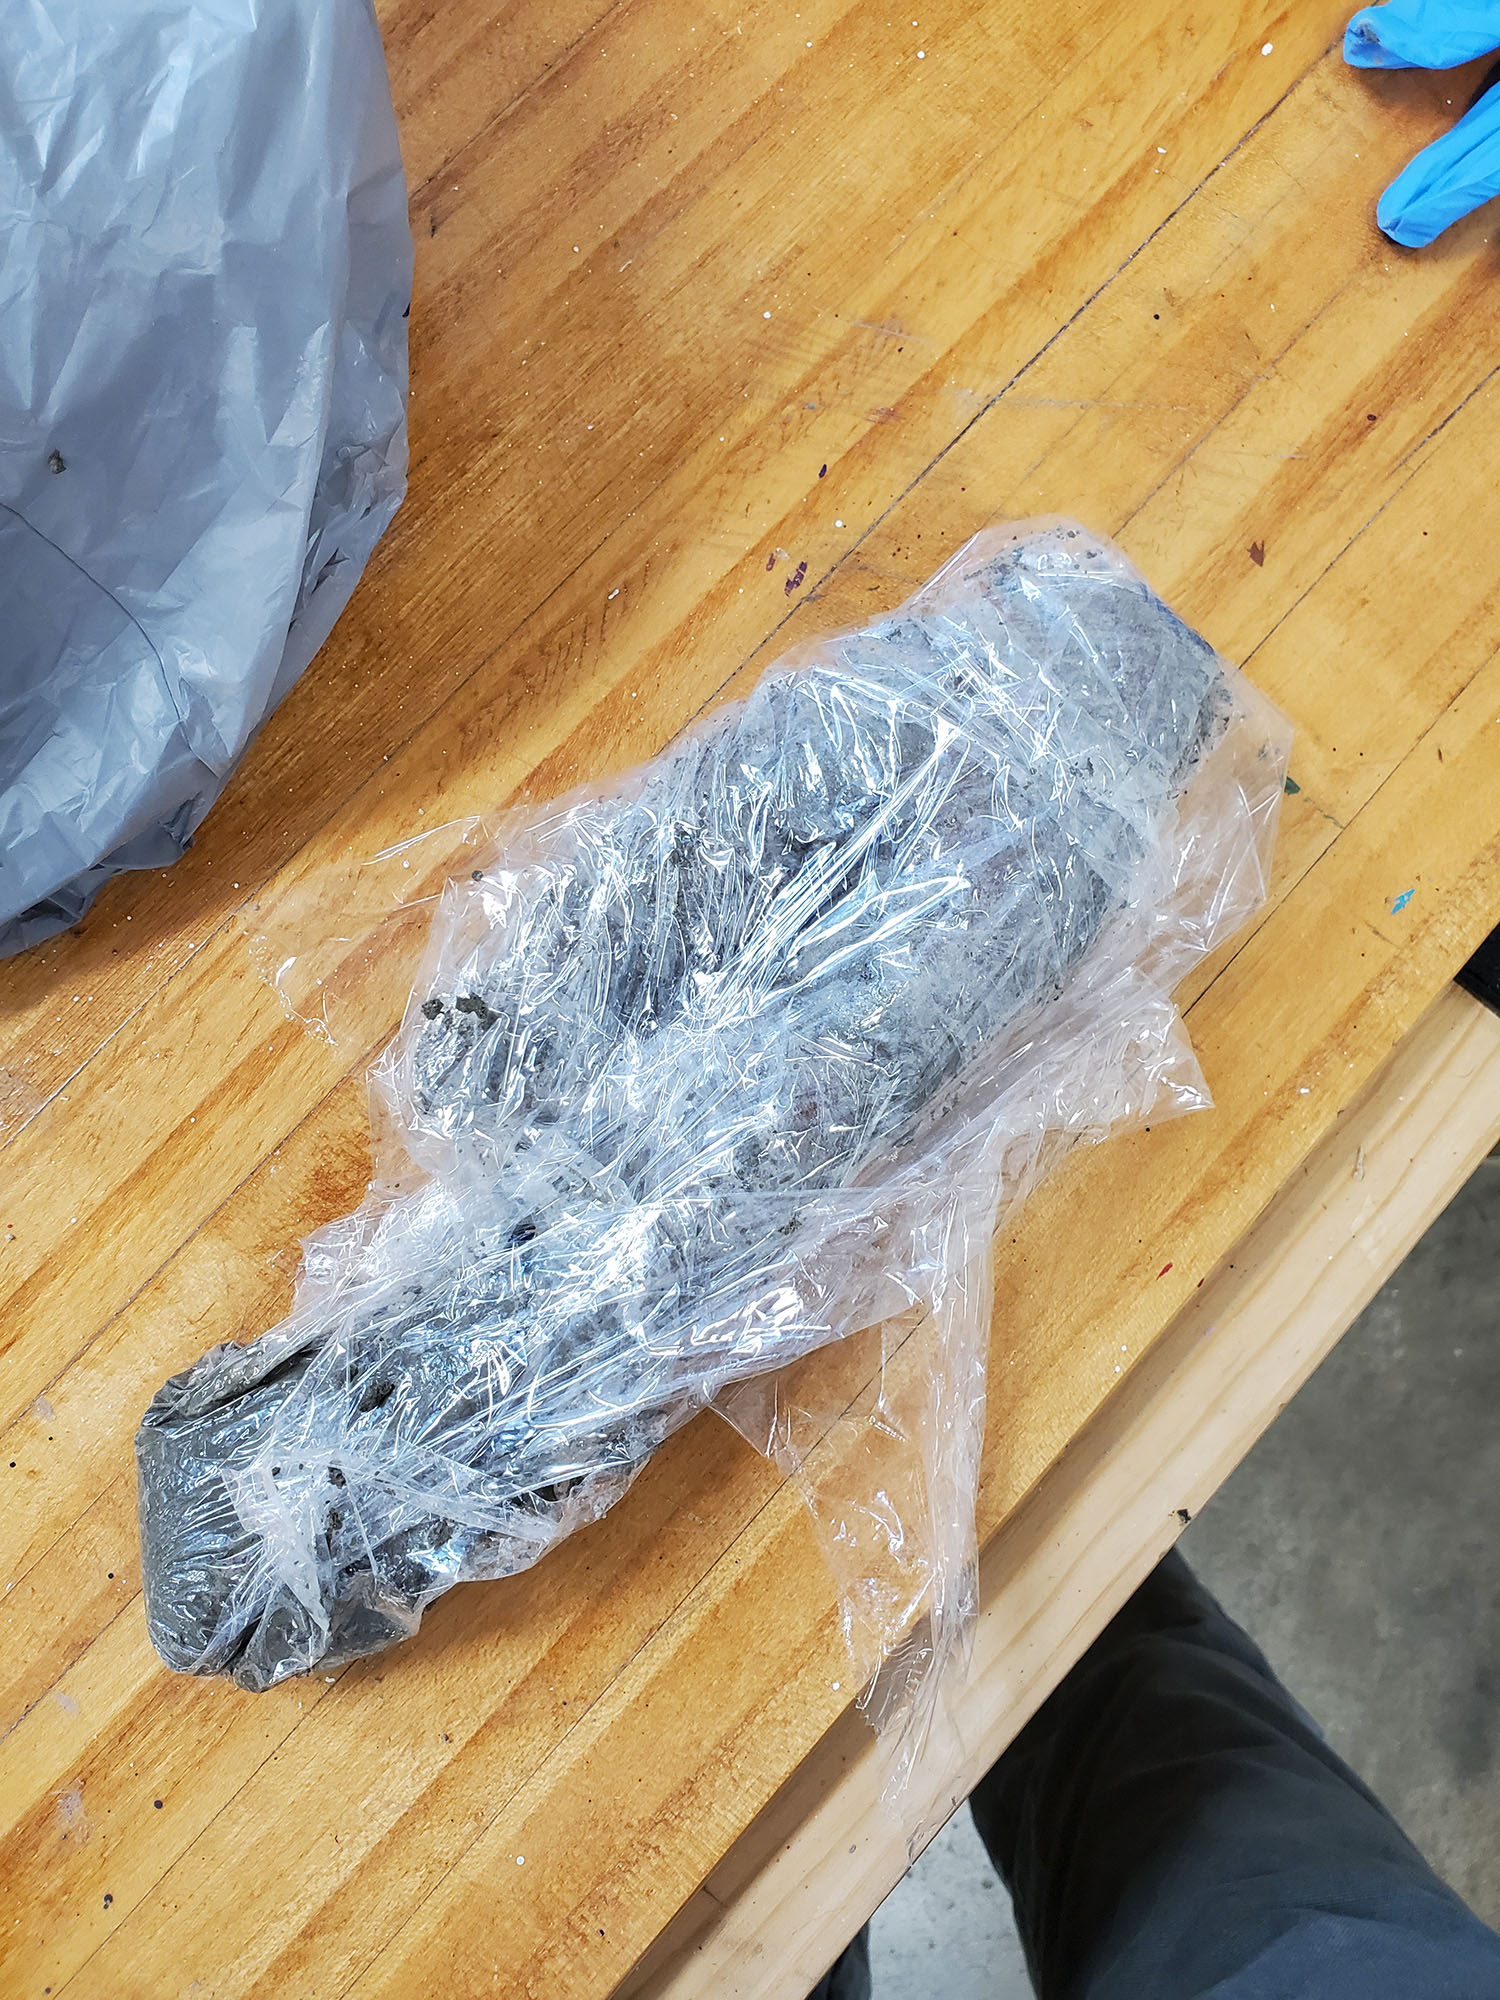
My first piece was a utensil for something that does not exist, titled “Memoir.” I wanted the piece to consider the bond between tool and user and how it becomes an extension of oneself. The twist is, when you create a tool with no obvious purpose and no known user, what does that tool become? I thought it interesting as well how tools can become physical records of lives simply by their existence. My goal was to make something two handed, with a very organic form, and would look like it had been used. My professor, Sarah gave me some great suggestions along the way like using cherry wood for its aging properties and smothering it in concrete (shown further down) to chemically burn the wood and provide an aged look.
 Download Image
I’m including all these progress images to demonstrate just how much effort goes into woodworking. All three of these projects took a very long time (for two of them, months) to plan, execute, and finish. I don’t want to just show the final product as I feel as though that is a disservice to the medium itself as well as all the effort I personally put in (plus, I think it’s cool to see how these project evolved).
 Download Image
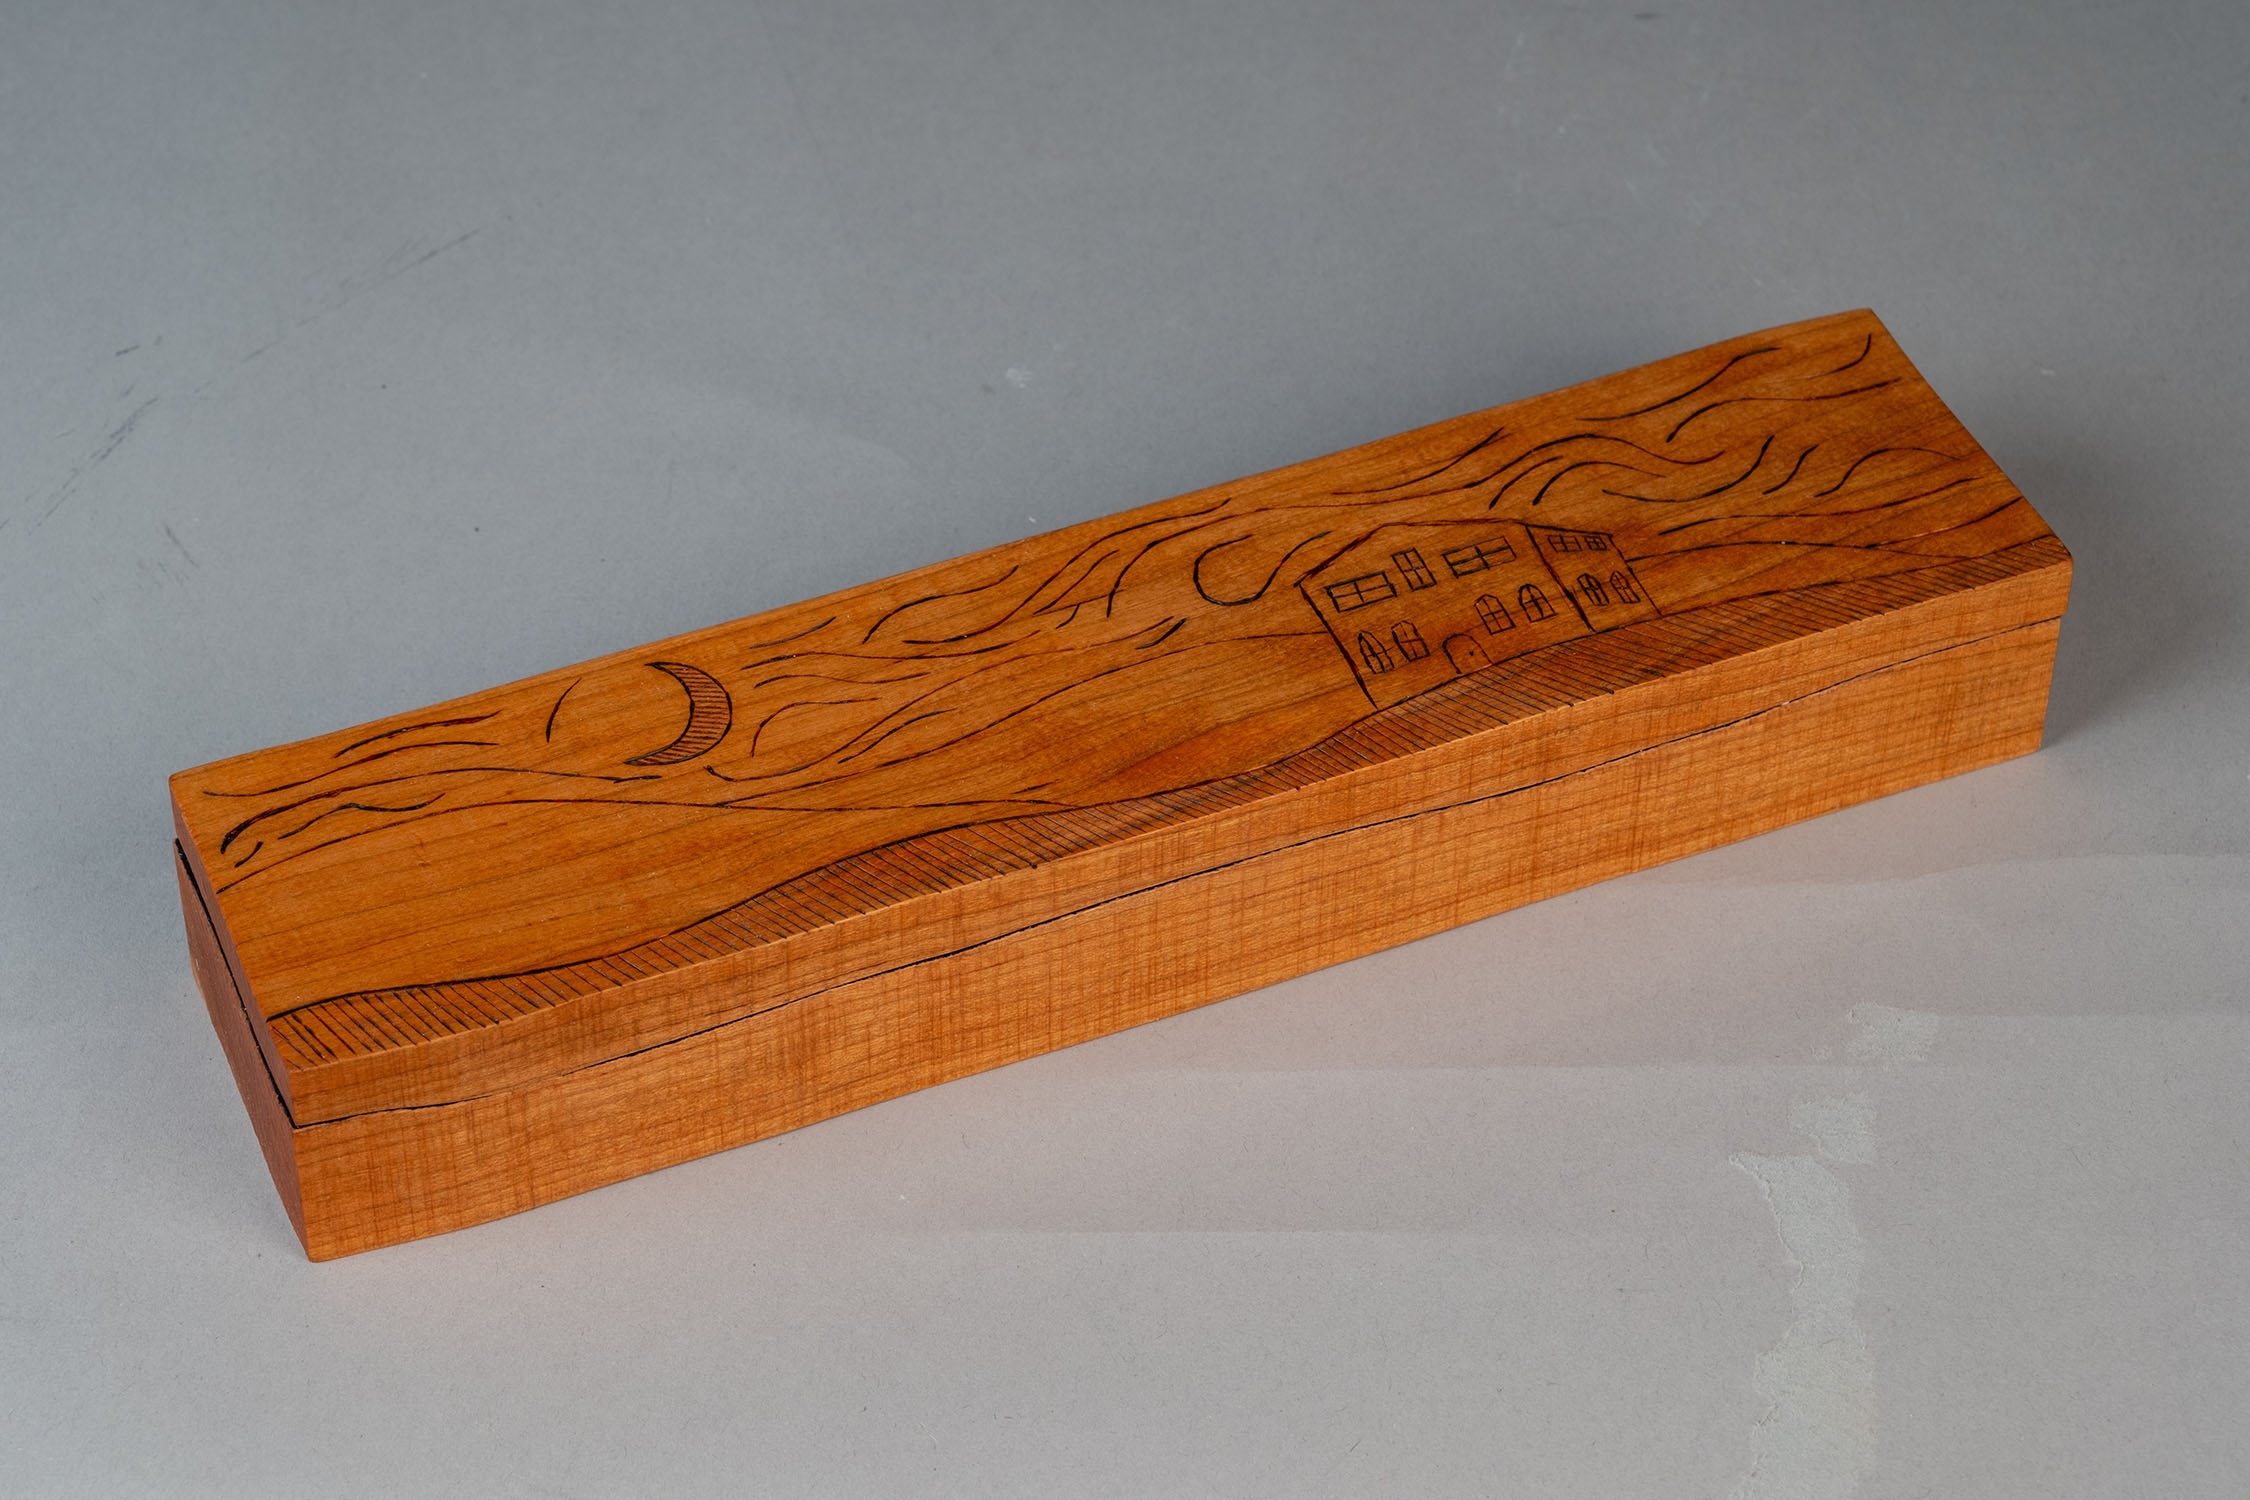
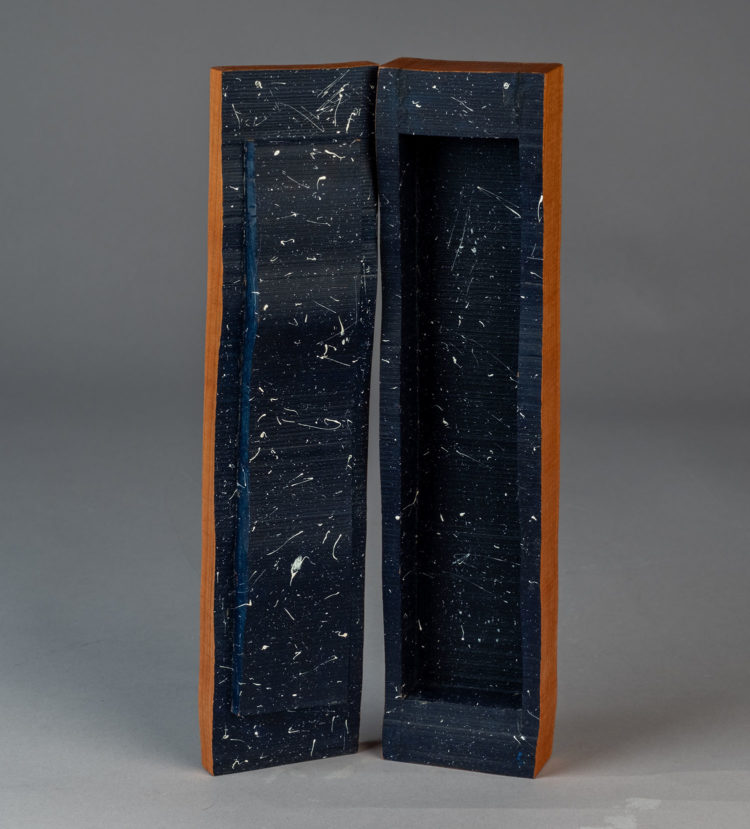
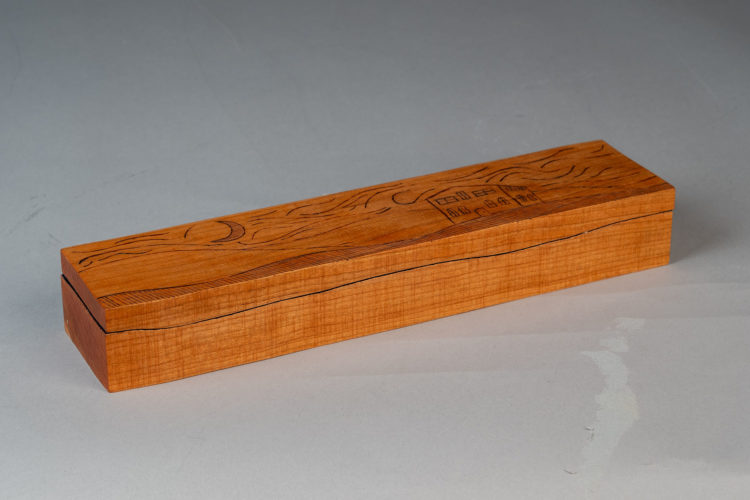
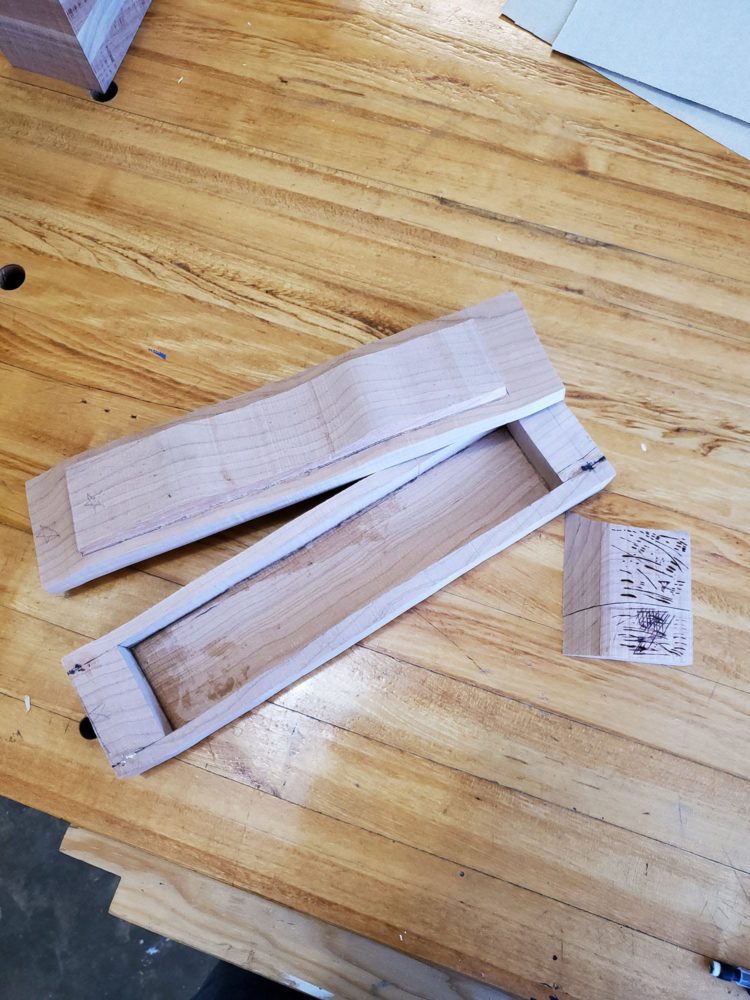
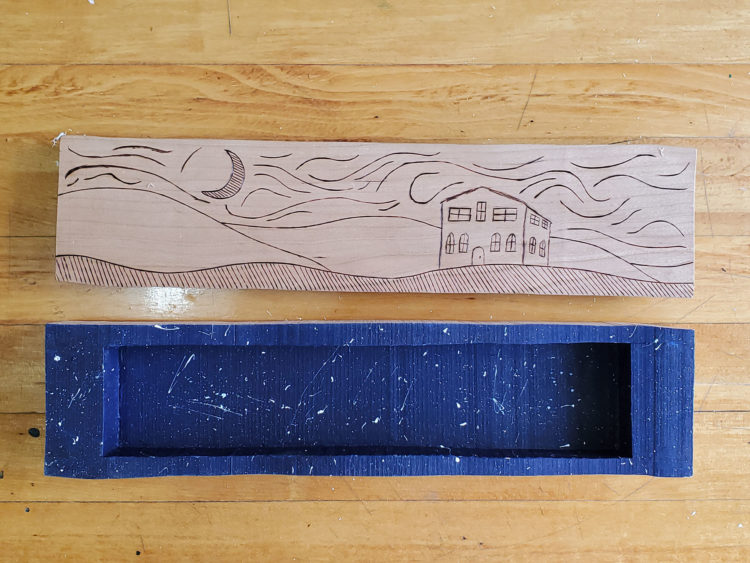
For my next project, a bandsaw box, I decided pretty early on that I would like to work with cherry again. While doing some final rounding on the nub and handles of my utensil, I used a belt sander which actually burned the cherry a bit. It gave it a really deep, almost blood red look which I really liked. For that reason, I wanted to try wood burning to add extra detail to the box without having to focus too heavily on a unique construction. The result was an windy night on a plain illustrated on the lid, and a contrasting “starry sky” on the inside.
 Download Image
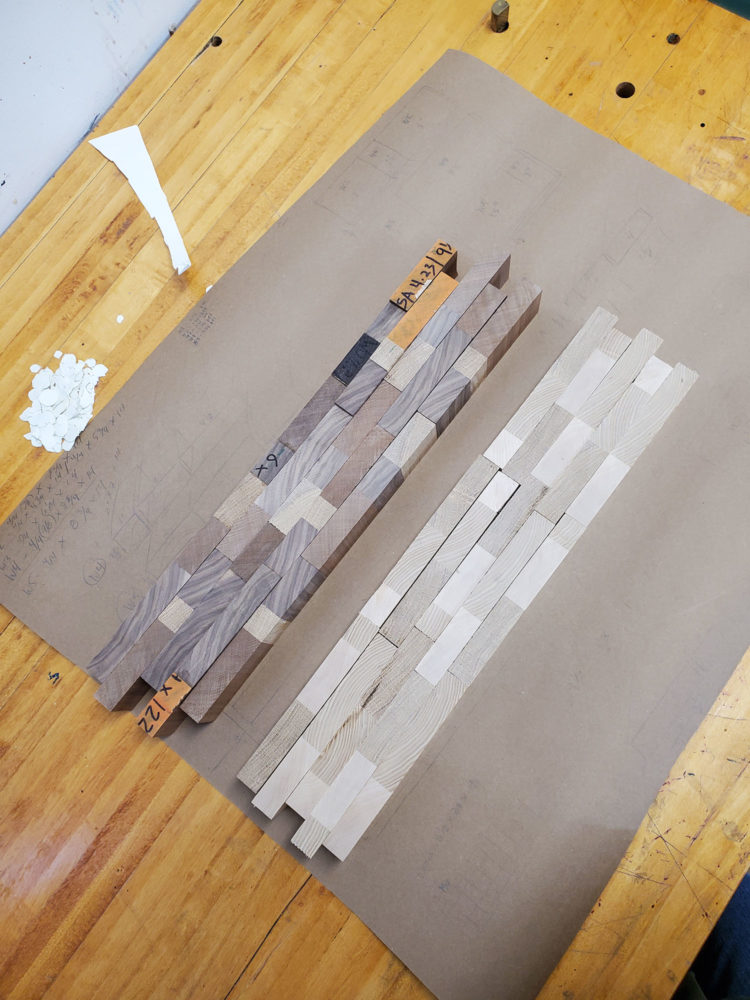
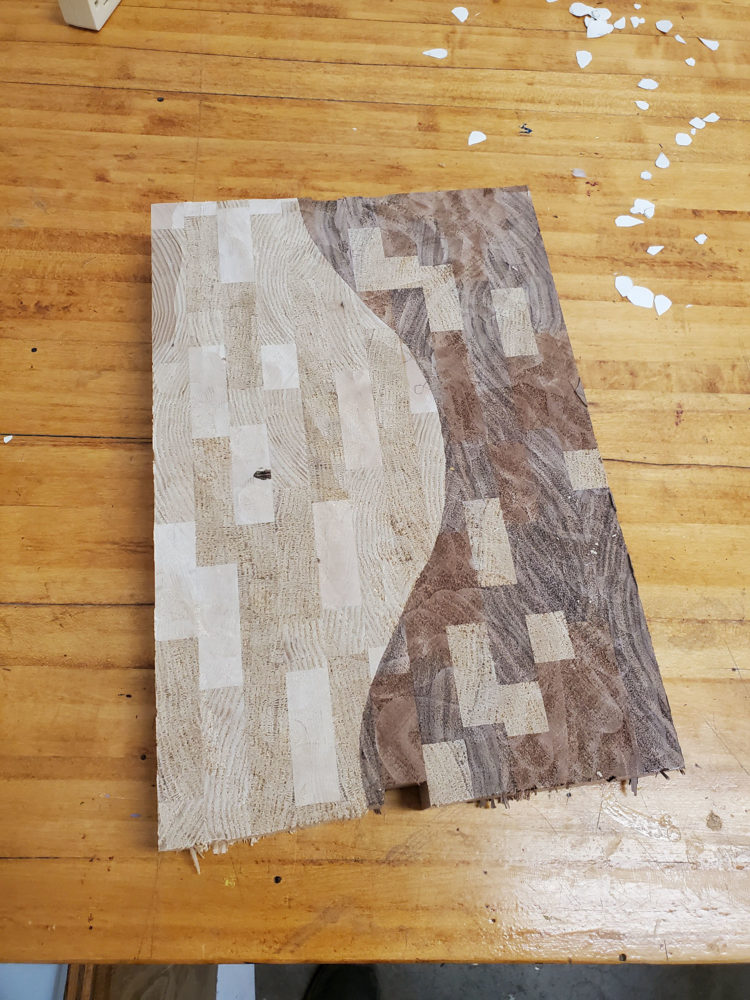
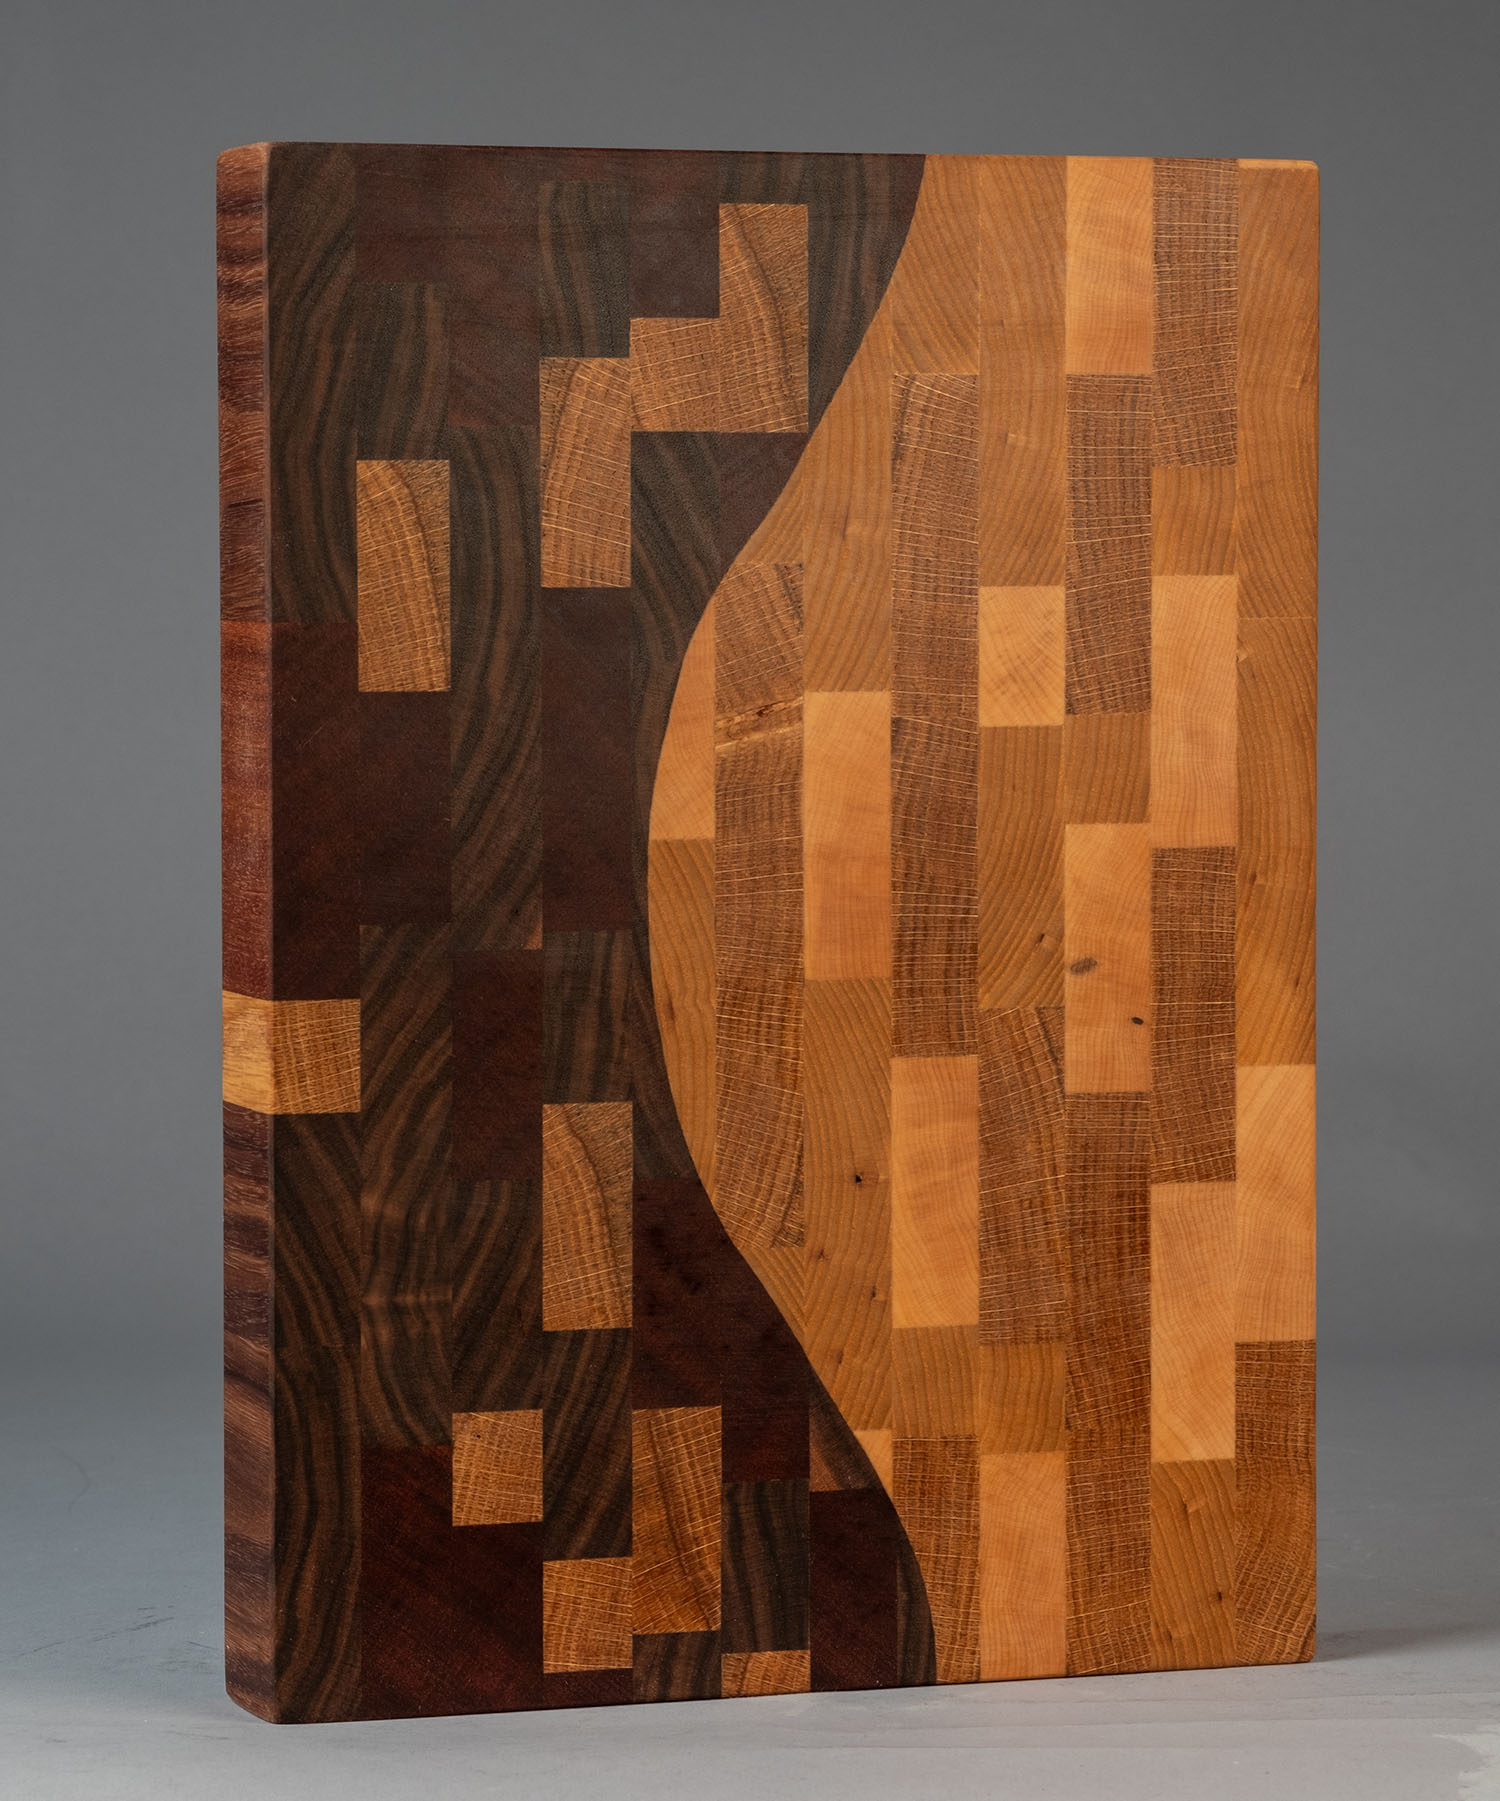
Finally, for my cutting board, I was thinking about of the idea of “cutting something in half.” For me, that brought up the fact that at the age of 18 I spent half my life in Orlando, FL and half my life in Chattanooga, TN. I thought it’d be interesting to create a board out of two contrasting halves with a common element shared between them. I chose two dark woods (Walnut, Sapele), one medium wood (White Oak), and two light woods (White Ash, Maple) to make up my sections.
 Download Image
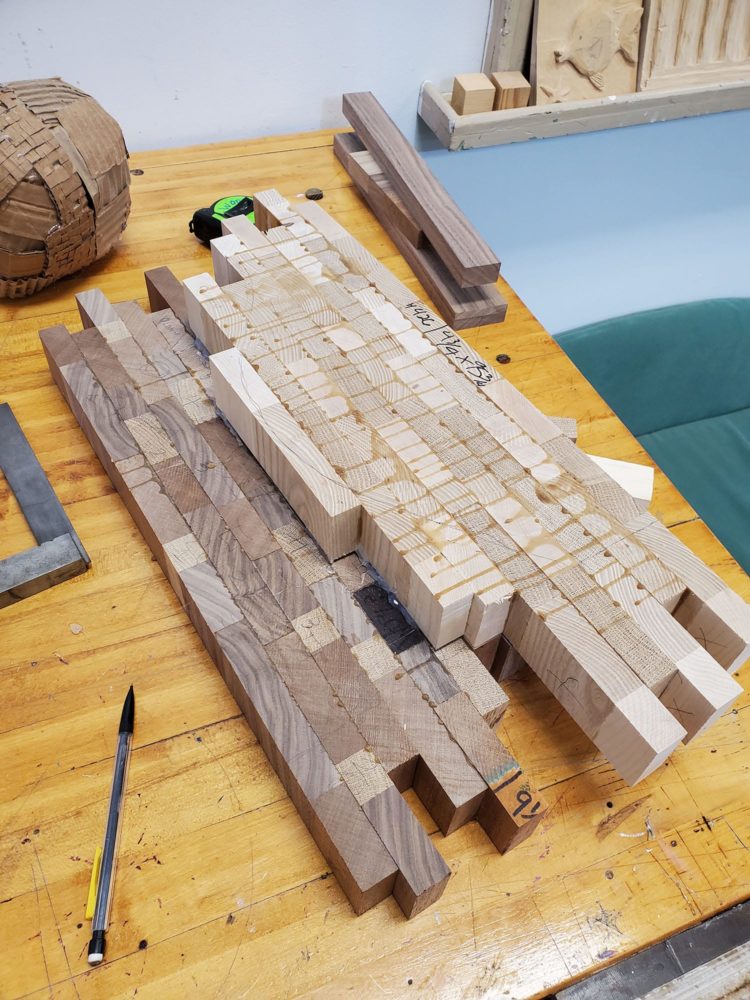
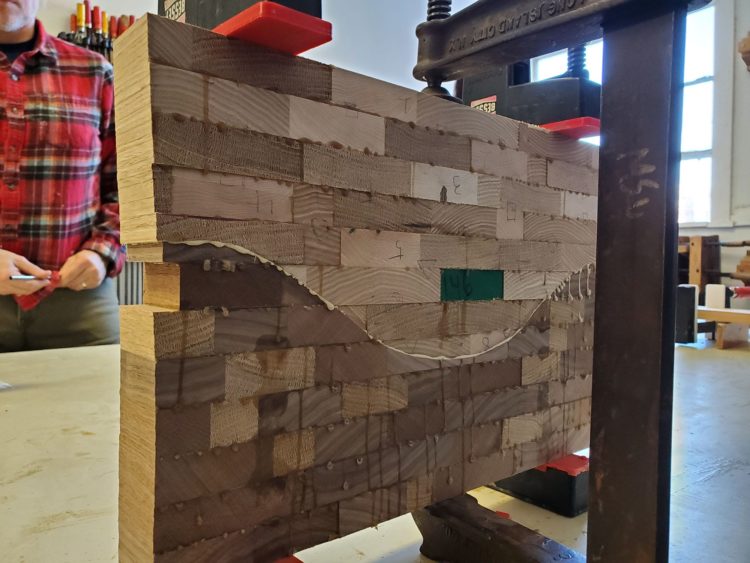
Each wood was combined into six unique types of “hybrid” boards (three for the light side, three for the dark side) that contained either two or three types of wood, depending on which half it was going to be used on. Because this was an end grain cutting board, the hybrid boards were cut horizontally into 1 3/4in piece to give me the thickness I wanted. This made them ready to be arranged and then glued into longer strips (shown below), and eventually glued into two rough halves of the final board. Then, with the help of Sarah, we created a custom jig to create a perfect curve between them in one single cut using a bandsaw, and then glued them together. Finally, after flattening it using a router and multiple types of sanding passes, I covered it in mineral oil and the piece was complete.